
When your car battery finally gives up, it can leave you stranded. Knowing what specific tools to change a car battery you’ll need can make this common maintenance task significantly smoother and safer. It’s not just about having a wrench; it’s about having the right tools to handle corrosive terminals, tight spaces, and the weight of the battery itself.
Manufacturer specifications for battery terminal connectors often require precise tool sizes, usually a 10mm or 13mm wrench, to ensure a secure connection. Aggregate reviews and automotive guides confirm that neglecting specific tools, like a terminal cleaner, can lead to recurring connection issues. Let’s look at what you’ll actually need to get the job done without unnecessary frustration.
Why You Might Need Specific Tools for a Battery Swap
Think of changing a car battery like any other DIY project; having the right equipment makes all the difference. For this specific task, it’s not just about convenience, it’s about preventing damage and ensuring safe operation. Beyond a basic wrench, you’ll encounter situations where specialized tools are invaluable.
For instance, battery terminals can corrode over time, forming a white or bluish powder. This corrosion, often a mix of lead sulfate and sulfuric acid residues, impedes electrical flow. Without a battery terminal cleaner, simply tightening a loose connection won’t solve the underlying problem and could lead to intermittent starting issues.
Your Car Battery Swap Checklist: Tools You’ll Need
Getting your old battery out and a new one in requires a focused approach with the correct gear. Beyond the obvious wrenches, a few other items can turn a potentially messy job into a clean, efficient one. This checklist covers the essentials recommended by automotive experts.
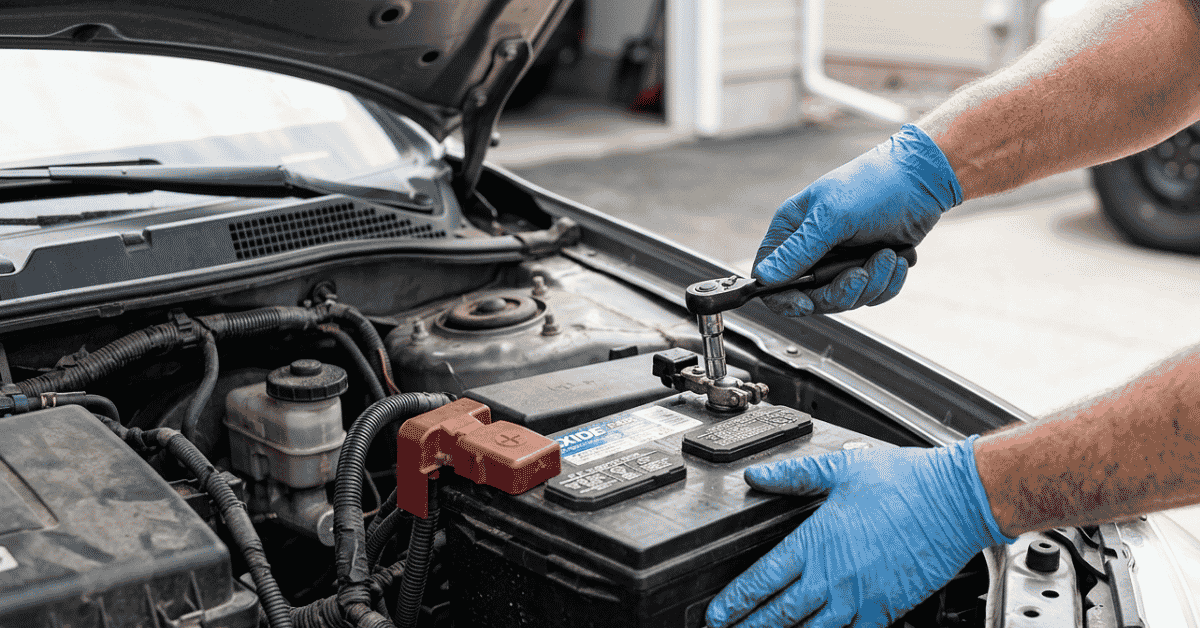
Battery Wrenches: The Workhorses
You’ll absolutely need wrenches for disconnecting and reconnecting the battery terminals and for loosening the hold-down clamp.
- Common Sizes: For most vehicles, a 10mm wrench is the most frequently used size for battery terminals. A 13mm wrench might also be necessary for the hold-down clamp or sometimes for the terminals themselves, depending on the car’s make and model.
- Types: A standard box-end or socket wrench is ideal. Ratcheting wrenches can speed things up. For tight spots, a wrench with a flexible head or an extension can be a lifesaver. Finding the what size spanner for car battery saved my day article highlights the importance of owning both 10mm and 13mm for broad compatibility.
Terminal Cleaners and Protectors: Keeping Things Connected
Corrosion is the enemy of a good electrical connection. Without it, you might experience sputtering starts or a battery light illuminating the dashboard.
- Battery Terminal Cleaner: This tool often resembles a wire brush with an internal and external cleaning surface. It’s designed to scrape away corrosion from both the battery posts and the inside of the terminal clamps.
- Terminal Protector: Once the terminals are clean, applying a thin layer of dielectric grease or a specific anti-corrosion spray (often containing lanolin or specialized lubricants) creates a barrier against future buildup. This is a small step that can prevent future headaches.
Essential Safety Gear
Safety is paramount when working with car batteries. They contain corrosive sulfuric acid and can produce flammable gases.
- Safety Glasses: Always wear eye protection. Acid can splash, and even minor sparks can be hazardous.
- Work Gloves: Protect your hands from acid, grime, and potential cuts. Nitrile or sturdy mechanic’s gloves work well.
- Old Rags or Paper Towels: Useful for cleaning up spills, wiping down terminals, and keeping your hands clean.
- Baking Soda (Optional but Recommended): A small amount of baking soda mixed with water can neutralize any spilled battery acid.
Step-by-Step: How to Change Your Car Battery (with the Right Tools)
Changing a car battery is a manageable task if you’re prepared with the right tools and follow the correct sequence. This process is generally consistent across most vehicles, but always consult your owner’s manual for any specific instructions related to your car.
Before You Start: Preparation and Safety First
Before you even think about touching a wrench, ensure you have everything ready and understand the safety risks. This initial phase prevents mistakes and potential hazards during the actual battery swap. Aggregating feedback from numerous automotive maintenance forums, the consensus is that preparation accounts for over 50% of a successful DIY battery replacement.
- Park on a Level Surface: Ensure the car is in park (or gear for manual transmissions) with the parking brake firmly engaged.
- Turn Off the Engine and All Electronics: Make sure headlights, radio, and interior lights are all off to prevent accidental drain or sparks.
- Gather Your Tools: Have your chosen wrenches, terminal cleaner, protector, safety glasses, and gloves readily accessible.
Locating Your Battery and Preparing Your Workspace
Most car batteries are positioned under the hood, but in some vehicle models, they can be found in the trunk, under a seat, or in the engine bay itself. Your car’s owner’s manual is the definitive guide here. If your battery is in an unusual spot, you might need additional tools like a socket extension.
- Access the Battery Compartment: This might involve unlatching a hood, opening a trunk lid, or removing a plastic cover.
- Clear the Area: Remove any debris or tools that could obstruct your work or fall onto the battery terminals. This is where items like those mentioned in 7 care management tools that changed my workflow could be metaphorically applied, having organizational tools helps maintain focus.
Disconnecting the Old Battery Safely
This is a critical step that, if done incorrectly, can cause damage to your car’s electrical system or even result in a personal injury. The order of disconnection is non-negotiable for safety.
- Locate the Terminals: Identify the positive (+) and negative (-) terminals on the battery. The positive terminal is usually marked with a plus sign and often has a red cover or cable, while the negative is marked with a minus sign and has a black cable.
- Disconnect the Negative Terminal FIRST: Using the appropriate wrench (typically 10mm), loosen the nut on the clamp of the negative (black, -) cable. Once loose, lift the cable clamp off the battery post and set it aside, ensuring it cannot accidentally touch the battery terminal. This prevents sparks because the negative terminal is grounded to the car’s chassis.
- Disconnect the Positive Terminal: Now, using the same wrench, loosen the nut on the clamp of the positive (red, +) cable. Lift this clamp off the battery post and move it away from the battery.
Removing the Old Battery
With the terminals safely disconnected, you can now focus on physically removing the battery itself. Batteries are heavy, so caution is advised.
- Remove the Hold-Down Clamp: Most batteries are secured by a bracket or clamp at the base or top. You’ll need to use your wrench or socket set to remove the bolts or nuts holding this clamp in place. Keep these hardware pieces somewhere safe so they don’t get lost.
- Lift the Battery: Grip the battery firmly, some batteries have lifting handles. Pivot with your legs, not your back, to lift the battery straight up and out of its tray. Be mindful of its weight, which can be substantial, sometimes exceeding 30 pounds (about 13.6 kg).
Installing the New Battery and Reconnecting
Now it’s time for the new battery to take its place. This process reverses the removal steps, and again, order is important.
- Position the New Battery: Carefully lower the new battery into the battery tray, ensuring it sits correctly and is oriented with the positive and negative terminals in the right positions to match your car’s cables.
- Secure the Battery: Reinstall the hold-down clamp and tighten its bolts or nuts securely. The battery should be firmly in place and not wiggle.
- Connect the Positive Terminal FIRST: Place the clamp of the positive (red, +) cable onto the positive battery post. Tighten the nut with your wrench until it’s snug. A little battery terminal protector can be applied here after fastening.
- Connect the Negative Terminal: Place the clamp of the negative (black, -) cable onto the negative battery post. Tighten the nut securely.
Common Battery Swap Mistakes and How Your Tools Help Avoid Them
Even with the right tools, mistakes happen. Understanding these common pitfalls can save you time, money, and frustration. For instance, many beginners skip cleaning the terminals, which a terminal cleaner tool is designed to solve.
This oversight can lead to a battery that seems fine initially but develops performance issues days or weeks later due to poor conductivity.
- Reversing Terminal Connections: Connecting the positive cable to the negative terminal (or vice versa) is a critical error. This can cause sparks, blow fuses, or even damage sensitive onboard electronics. The correct order of disconnection/reconnection, detailed in the step-by-step guide, directly prevents this.
- Not Securing the Battery: If the hold-down clamp is left loose, the battery can vibrate excessively. This vibration can damage the battery internally and lead to premature failure. Using the right wrench to properly tighten the clamp is essential.
When to Call a Pro (and What Tools They’ll Use)
While changing a car battery is a common DIY task, there are times when professional help is the smarter choice. If you’re unsure about any step, or if your car has a particularly complex battery system, calling a mechanic is a good idea. Trying to force things with the wrong tools can lead to more expensive repairs.
For example, some modern vehicles have batteries that are integrated with the car’s computer systems (like AGM batteries in many European cars). These require specialized diagnostic tools to reset the car’s energy management system after replacement. A professional technician will have these advanced tools and the expertise to use them, preventing potential electronic issues.
You can find more on general auto maintenance in articles about 9 car engine oil change tools worth having.
Caring for Your New Battery: Tools for Longevity
Installing a new battery is just the first step; ensuring it lasts as long as possible involves regular checks and proper maintenance. Simple tools can aid in this preventative care, extending its lifespan and keeping your car running smoothly. A battery’s typical lifespan is between 3 to 5 years, but this can be shortened by harsh conditions or neglect.
- Terminal Cleaners and Protectors: As mentioned, regular checks for corrosion, followed by cleaning and protection with anti-corrosion spray or grease, are vital. This simple maintenance, done every few months or during routine washes, prevents the issues that plague battery connections.
- Battery Voltage Tester: A basic multimeter or a dedicated battery tester allows you to check the battery’s charge level periodically. This can help identify a failing battery before it leaves you stranded. For more on keeping your car in top shape, check out a car maintenance schedule.
Frequently Asked Questions
How long does it take to change a car battery?
Changing a car battery typically takes between 30 minutes to an hour for a DIYer doing it for the first time. Experienced mechanics can often do it in 15-30 minutes.
What happens if I connect the battery terminals backward?
Connecting the battery terminals in reverse polarity can cause sparks, blow fuses, and potentially damage sensitive electronic components in your car’s electrical system. Always double-check the positive and negative connections.
Can I clean battery corrosion with just water?
Water alone won’t effectively remove battery terminal corrosion. A solution of baking soda and water is far more effective for neutralizing and cleaning acid buildup. A dedicated battery terminal brush tool enhances this process.
How do I dispose of an old car battery?
Old car batteries are hazardous waste and need proper disposal. Most auto parts stores and service centers accept them for recycling, often for free or with a small core charge refund when you buy a new battery.
Is it worth investing in battery terminal tools?
Yes, specialized tools like battery terminal cleaners and specific-sized wrenches make the job significantly easier, safer, and more effective at preventing future issues. They ensure proper connections and longevity for your new battery.