
graco car seat installation can feel overwhelming at first. Learn the correct setup steps, avoid common mistakes, and help keep every ride safer.
Graco car seat installation became something I took seriously after helping a friend install a new seat for her toddler. We thought the process would take only a few minutes. Instead, we discovered several details that could easily be missed. A properly installed car seat helps provide better protection and greater peace of mind. The good news is that most Graco car seats are designed with user-friendly features that simplify installation. This guide covers the basic installation process, common mistakes, safety checks, and practical tips that help parents install a Graco car seat correctly.
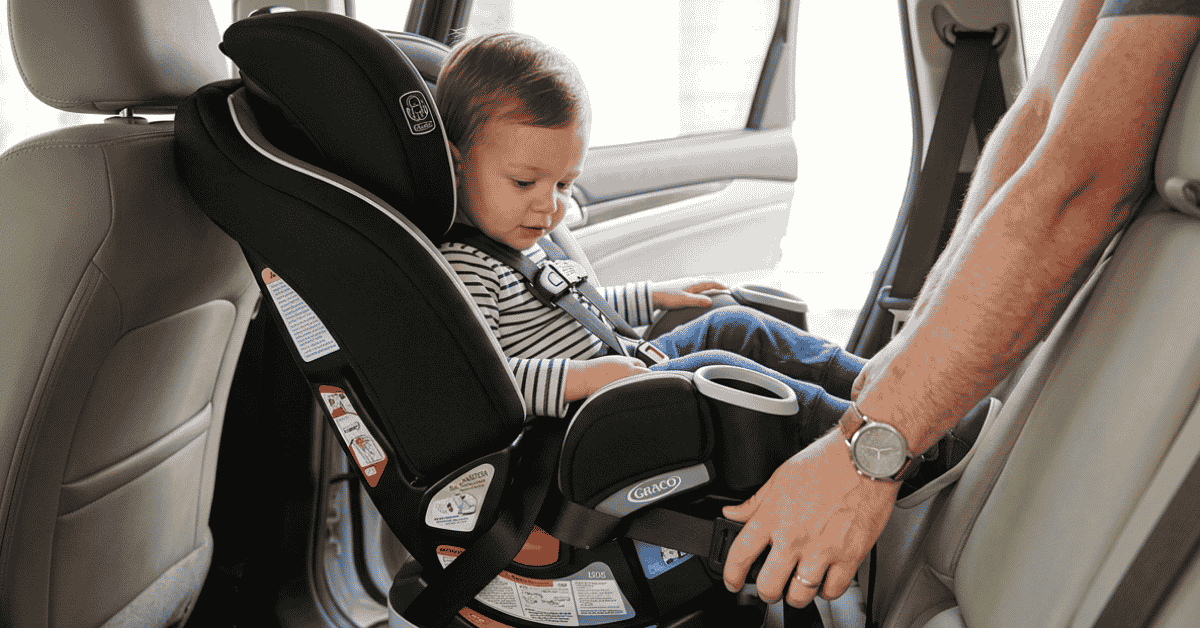
How Does Graco Car Seat Installation Work?
Many parents feel nervous the first time they install a car seat. That reaction is completely understandable. A child’s safety depends on proper installation, and the instructions can sometimes seem confusing.
The first Graco seat I installed took nearly half an hour because I checked everything twice. Over time, I learned that understanding the basic process makes installation much easier and faster.
Choose the Correct Installation Method
Most Graco seats support one or both of these methods:
- Vehicle seat belt
- LATCH system
LATCH stands for Lower Anchors and Tethers for Children.
Always review both your vehicle manual and car seat manual before starting.
Basic Installation Steps
Use this general process:
- Place the seat in the correct position.
- Select the installation method.
- Route the belt or connectors correctly.
- Tighten securely.
- Check for movement.
- Verify harness settings.
Take your time during each step.
Installation Overview Table
| Step | Action | Goal |
|---|---|---|
| 1 | Position seat | Correct placement |
| 2 | Connect anchors or belt | Secure attachment |
| 3 | Tighten system | Reduce movement |
| 4 | Verify angle | Proper positioning |
| 5 | Perform safety check | Confirm installation |
Read Both Manuals Carefully
Many installation mistakes happen because one manual gets ignored.
Important information includes:
- Weight limits
- Seating positions
- Anchor usage
- Recline settings
The manuals work together to guide proper installation.
Choosing Between LATCH and Seat Belt Installation
Many parents wonder which installation method is better. The answer depends on your specific vehicle, seat, and child weight. Both methods can provide a secure installation when used correctly.
I once assumed LATCH was always easier. After working with several vehicles, I discovered that some seat belt installations can actually feel simpler and tighter.
Understanding the LATCH System
LATCH simplifies installation in many vehicles.
Benefits include:
- Easier setup
- Reduced confusion
- Faster installation
- Secure anchor connections
Most newer vehicles include LATCH anchor points.
Understanding Seat Belt Installation
Seat belt installation remains widely used.
Advantages include:
- Broad compatibility
- Flexible seating positions
- No lower anchor weight restrictions
- Reliable security
Many certified technicians use this method regularly.
Check Weight Limits
Weight limits matter.
Review:
- Car seat manual
- Vehicle manual
- Anchor restrictions
- Child weight guidelines
Some installations require switching methods as children grow.
Evaluate Vehicle Layout
Every vehicle differs.
Factors include:
- Seat shape
- Anchor access
- Available space
- Seating positions
A method that works perfectly in one vehicle may not be ideal in another.
Focus on Proper Installation
The safest method is usually the one installed correctly.
Prioritize:
- Tight installation
- Correct routing
- Proper positioning
- Manufacturer instructions
Correct use matters more than preference.
Important Safety Checks After Installation
Installing the seat is only the first step. Safety checks help confirm that everything works as intended. These inspections take only a few minutes and can improve confidence before every trip.
I always perform a final review after installation. That habit has helped me catch small mistakes more than once.
Perform the One-Inch Test
The one-inch test is simple.
Grip the seat near the belt path and gently push side to side.
The seat should not move more than one inch in any direction.
Verify Recline Angle
Many Graco seats require specific recline settings.
Check:
- Angle indicators
- Level lines
- Recline positions
- Manual guidance
Proper angles help improve comfort and support.
Inspect Harness Position
Harness placement changes as children grow.
Review:
- Shoulder height
- Strap routing
- Chest clip location
- Harness tension
Correct adjustment improves fit.
Check the Chest Clip
The chest clip should sit at armpit level.
This position helps:
- Keep straps aligned
- Improve harness placement
- Maintain proper fit
- Support restraint performance
Avoid placing it too low.
Confirm Anchor Security
Inspect every connection carefully.
Verify:
- Tight attachment
- Proper routing
- Locked connectors
- Secure hardware
A final check can reveal overlooked issues.
Common Graco Car Seat Installation Mistakes
Many installation errors occur because parents rush or overlook small details. Most mistakes are easy to avoid with a little patience and attention.
A neighbor once struggled with a loose installation for nearly an hour. The issue turned out to be an incorrectly routed belt that took seconds to fix.
Installing in the Wrong Belt Path
Many seats have multiple belt paths.
Using the wrong path can affect:
- Stability
- Fit
- Installation quality
- Seat positioning
Always verify the correct route.
Leaving Excess Movement
A loose seat reduces effectiveness.
After installation:
- Perform the one-inch test
- Tighten as needed
- Recheck connections
- Verify anchor engagement
Movement should remain minimal.
Ignoring Recline Indicators
Recline settings serve an important purpose.
Incorrect angles may affect:
- Comfort
- Positioning
- Fit
- Support
Always use the indicators provided.
Skipping the Vehicle Manual
Many parents focus only on the car seat instructions.
Vehicle manuals explain:
- Approved seating locations
- Anchor positions
- Weight limits
- Installation requirements
Both manuals matter equally.
Using Both Systems Incorrectly
Some parents attempt to combine systems improperly.
Follow manufacturer guidance regarding:
- Seat belt use
- LATCH use
- Combined installation
- Weight restrictions
Avoid assumptions.
Forgetting Harness Adjustments
A properly installed seat still requires harness adjustment.
Check:
- Strap height
- Harness tension
- Chest clip placement
- Child fit
Installation and harness adjustment work together.
Failing to Recheck Over Time
Seats may loosen slightly with use.
Create a routine:
- Weekly inspection
- Monthly review
- Post-travel check
- Seasonal verification
Regular maintenance helps maintain security.
Rushing the Process
Most installation errors happen when people hurry.
Allow time for:
- Reading instructions
- Testing movement
- Verifying settings
- Performing safety checks
Patience improves results.
Graco car seat installation becomes much easier once you understand the basic steps and safety checks. Whether you choose LATCH or seat belt installation, the goal remains the same: creating a secure, stable setup that protects your child during every ride. Taking a few extra minutes to verify movement, harness fit, recline angle, and anchor security can make a significant difference. A careful installation today provides confidence and peace of mind for every trip that follows.
Frequently Asked Questions
How tight should a Graco car seat be after installation?
The seat should move less than one inch when tested at the belt path. Excess movement usually means additional tightening is needed.
Is LATCH safer than a seat belt installation?
Both methods can be equally safe when installed correctly and used according to the vehicle and car seat manuals.
Can I install a Graco car seat without LATCH anchors?
Yes. Most Graco car seats support seat belt installation, making them compatible with a wide range of vehicles.
How often should I check my car seat installation?
Inspect the installation regularly, especially after travel, cleaning, seat adjustments, or whenever the seat has been moved.
Where should the chest clip be positioned?
The chest clip should sit at armpit level to help maintain proper harness positioning and improve overall fit.