
safety 1st forward facing car seat gives parents simple safety features, easy setup, and long-term value. Read this guide before you buy.
Safety 1st forward facing car seat became a topic in my home on a rainy Saturday afternoon. My son had nearly reached the rear-facing limit, and I wanted facts, not sales talk. After testing models, reading manuals, and checking safety guidance, I learned a lot. Some lessons surprised me. Others saved time and stress. This guide shares the details that matter most so you can choose, install, and use a forward-facing car seat with more confidence.
Is a Safety 1st Forward Facing Car Seat a Good Choice for Growing Kids?
Many parents reach a point when their child starts to outgrow a rear-facing setup. The next step often feels exciting. Kids enjoy seeing more during rides. Parents enjoy easier loading and unloading. Still, the change should happen only after height and weight limits are met. Safety should guide every choice.
During my search, I noticed many families pick Safety 1st because the brand offers practical features without a huge price tag. Several models combine comfort, protection, and growth-friendly design. That balance appeals to parents who want dependable performance without spending more than necessary.
Reasons Many Families Choose Safety 1st
Several benefits stand out.
- Budget-friendly pricing
- Easy-to-find replacement parts
- Comfortable seat padding
- Adjustable harness positions
- Side impact protection
- Long usage periods
Common Forward-Facing Options
| Feature | Typical Benefit |
|---|---|
| Five-point harness | Better child restraint |
| Adjustable headrest | Supports growth |
| Cup holders | Added convenience |
| Side protection | Extra crash support |
| Recline settings | Improved comfort |
Signs a Child May Be Ready
Look for these signs:
- Rear-facing limits reached
- Meets forward-facing requirements
- Sits upright comfortably
- Fits harness correctly
Always verify the exact limits listed in your car seat manual before making the switch.
Safety 1st Forward Facing Car Seat Features That Matter Most
Marketing claims can sound impressive. Real safety features matter far more. I learned this while comparing several popular car seat models. Fancy fabrics looked nice. Bright colors looked fun. Yet the strongest value came from features designed to protect children during real-world travel situations.
A forward-facing car seat works best when the child fits correctly and the seat is installed properly. Even advanced safety features cannot compensate for a loose harness or poor installation. Focusing on the fundamentals often delivers the biggest safety gains.
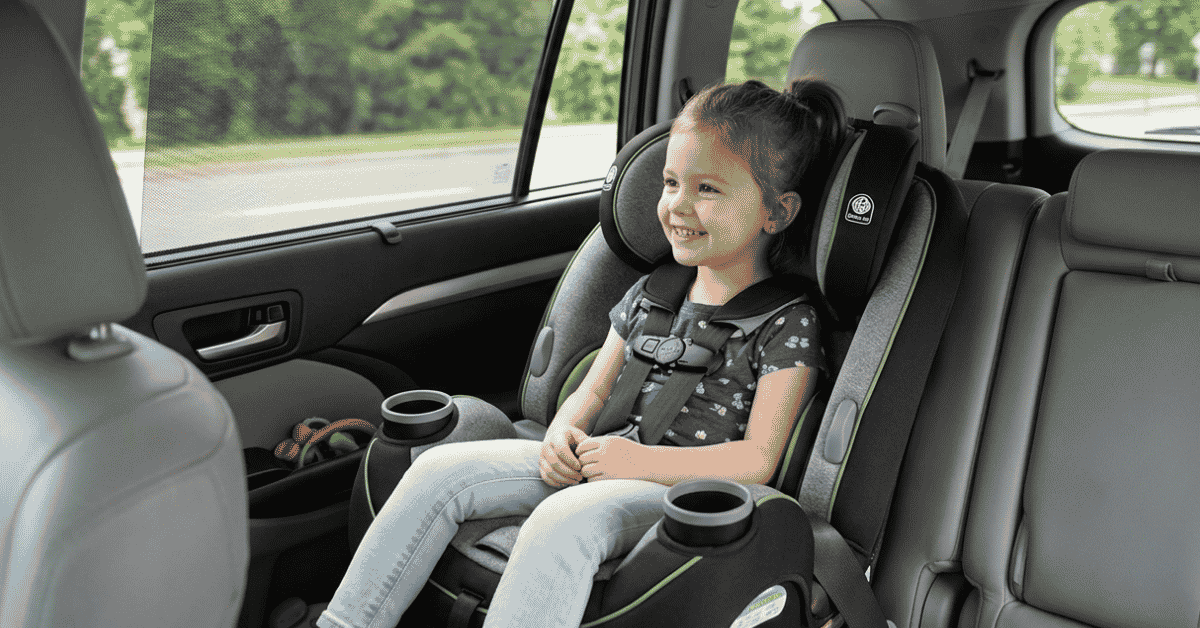
Five-Point Harness System
This remains one of the most important features.
The harness secures:
- Left shoulder
- Right shoulder
- Left hip
- Right hip
- Between the legs
This design helps spread crash forces across stronger areas of the body.
Side Impact Protection
Many Safety 1st models include reinforced side sections.
Benefits may include:
- Better head support
- Improved neck protection
- Added side crash coverage
Adjustable Headrest
Children grow fast.
An adjustable headrest helps:
- Maintain proper positioning
- Improve comfort
- Extend seat usability
Multiple Harness Heights
Parents can adjust the harness as their child grows.
This helps keep:
- Straps aligned correctly
- Fit secure
- Support consistent
Top Tether Compatibility
The top tether plays a major role in forward-facing safety.
Benefits include:
- Less forward movement
- Better stability
- Reduced head travel
Features Worth Comparing
| Feature | Why It Matters |
|---|---|
| Harness adjustment | Easier daily use |
| Side protection | Added safety |
| Tether support | Better crash control |
| Recline options | Child comfort |
| Machine-washable cover | Easier cleaning |
Parents often focus on appearance first. Smart buyers focus on safety features before style.
How to Install a Safety 1st Forward Facing Car Seat Correctly
Installation often causes the most stress. I remember spending nearly an hour on my first attempt. The process looked simple on the box. Real life felt different. After learning a few key steps, the task became much easier.
A properly installed seat can perform much better during a crash. Small mistakes can reduce protection. Taking a few extra minutes during setup is time well spent. Always read both the vehicle manual and the car seat manual before starting the installation process.
Step 1: Select the Seating Position
Many experts recommend the rear seat.
Check:
- Vehicle manual guidance
- Anchor locations
- Seat fit
Step 2: Choose Installation Method
Most models allow:
- LATCH installation
- Seat belt installation
Follow manufacturer instructions carefully.
Step 3: Secure the Seat
Apply firm pressure.
Then tighten:
- Lower anchors
- Seat belt path
- Tether strap
Step 4: Check Movement
Test the seat near the belt path.
A properly installed seat should move less than one inch side to side.
Step 5: Adjust the Harness
The harness should fit snugly.
Perform the pinch test.
If excess strap material can be pinched, tighten further.
Common Installation Mistakes
Avoid these errors:
- Loose harness straps
- Twisted webbing
- Low chest clip position
- Missing tether connection
- Incorrect recline setting
Quick Safety Checklist
| Inspection Item | Check |
|---|---|
| Harness snug | Yes |
| Chest clip level | Yes |
| Tether attached | Yes |
| Seat secure | Yes |
| Child fits properly | Yes |
Many local communities offer free car seat inspections. A certified technician can confirm proper installation and answer questions.
Making Your Safety 1st Forward Facing Car Seat Last Longer
Parents often hope one purchase will provide years of service. A quality forward-facing seat can do exactly that. Proper maintenance helps preserve safety and comfort while extending usable life. The effort required is small, yet the benefits can be significant.
I make a habit of checking our car seat every month. The process takes only a few minutes. Small issues become easier to fix before they turn into bigger problems. Regular inspections also help ensure the seat continues to fit the child correctly as growth occurs.
Monthly Inspection Routine
Check for:
- Cracked plastic
- Damaged buckles
- Frayed straps
- Missing labels
- Loose parts
Cleaning Best Practices
Follow manufacturer directions.
Generally:
- Use mild soap
- Avoid bleach
- Air dry covers when recommended
- Keep harness straps intact
Improper cleaning can weaken materials.
Watch for Expiration Dates
Every car seat has an expiration period.
Reasons include:
- Material aging
- Wear and tear
- Updated safety standards
Locate the expiration label and record the date.
Knowing When to Upgrade
Children eventually outgrow every harness seat.
Monitor:
- Height limits
- Weight limits
- Shoulder position
Once limits are reached, a booster seat may become the next safe step.
Buying Tips for New Parents
Before purchasing:
- Measure vehicle space.
- Review seat dimensions.
- Compare height limits.
- Check ease-of-install ratings.
- Read current owner reviews.
The cheapest seat is not always the best value. A seat that fits your child, vehicle, and daily routine often provides the greatest long-term satisfaction.
Frequently Asked Questions
How long can a child use a Safety 1st forward facing car seat?
Most children can use one until they reach the model’s stated height or weight limits. Always follow the limits printed in your specific manual.
Can I install the seat using a vehicle seat belt?
Yes. Most Safety 1st forward-facing seats support seat belt installation when completed exactly as described by the manufacturer.
Should I always connect the top tether strap?
Yes. The top tether helps reduce forward movement during a crash and improves overall forward-facing seat performance.
Can a forward-facing car seat be moved between vehicles often?
Yes, but proper installation must be checked every time. Frequent transfers increase the chance of setup mistakes.
How can I tell if the harness is tight enough?
Use the pinch test. If you cannot pinch excess webbing at the shoulder area, the harness is generally snug enough.