
Need to remove a car door handle protector safely? Learn simple methods to remove adhesive protectors without harming your car’s paint.
I first had to deal with a car door handle protector remove job on a cool Saturday morning. The protector had been on my car for years. It looked worn and faded. I thought removal would take minutes. I was wrong. The adhesive fought back. After some trial and error, I found a method that worked well. Since then, I have removed several protectors on different vehicles. Here is what I learned.
Is Car Door Handle Protector Remove Difficult?
Usually, no.
Most car door handle protectors can be removed without major trouble. The challenge often comes from old adhesive.
When I removed my first one, I worried about damaging the paint. Thankfully, with patience and the right steps, the surface stayed perfect.
The process becomes easier when you:
- Use heat properly
- Work slowly
- Remove adhesive carefully
- Avoid sharp tools
The key is patience rather than force.
What Is a Car Door Handle Protector?
Before removal, it helps to understand what you are working with.
A car door handle protector is a small protective layer placed behind or around a door handle.
Why People Use Them
These protectors help prevent:
- Scratches
- Fingernail marks
- Paint wear
- Minor scuffs
Many drivers install them on new vehicles.
I added mine after noticing tiny scratches near the handle.
Common Materials
Protectors are usually made from:
- Clear film
- Vinyl
- TPU material
- Silicone covers
Different materials affect how removal works.
Why Remove a Car Door Handle Protector?
There are several reasons.
Aging and Wear
Over time, protectors can:
- Fade
- Yellow
- Crack
- Peel
This often makes the car look older.
Upgrading to a New Protector
Sometimes you simply want a newer product.
Modern films often offer:
- Better clarity
- Stronger protection
- Longer lifespan
Selling the Vehicle
A clean appearance matters.
Removing worn protectors can improve the look of the vehicle before sale.
Paint Inspection
Some owners remove protectors to inspect the paint beneath.
I have done this before applying a fresh protector.
Best Tools for Car Door Handle Protector Remove
The right tools make the job much easier.
Hair Dryer
This is my favorite tool.
Benefits include:
- Gentle heat
- Easy control
- Safe for paint
Most people already have one at home.
Microfiber Cloth
A soft cloth helps prevent scratches.
Use it for:
- Cleaning
- Adhesive removal
- Final polishing
Adhesive Remover
A quality adhesive remover helps dissolve residue.
It can make cleanup much faster.
Plastic Card
A plastic card works better than metal tools.
Good options include:
- Old gift cards
- Plastic scraper tools
Never use sharp metal blades near paint.
Step-by-Step Car Door Handle Protector Remove Guide
This is the method I use most often.
Step 1: Clean the Area
Remove dirt first.
Wash around the handle using:
- Mild soap
- Water
- Soft cloth
A clean surface prevents scratches.
Step 2: Apply Heat
Warm the protector gently.
Hold a hair dryer several inches away.
Move it constantly.
The goal is to soften the adhesive.
Signs it is ready:
- Slight flexibility
- Warm surface
- Easier lifting
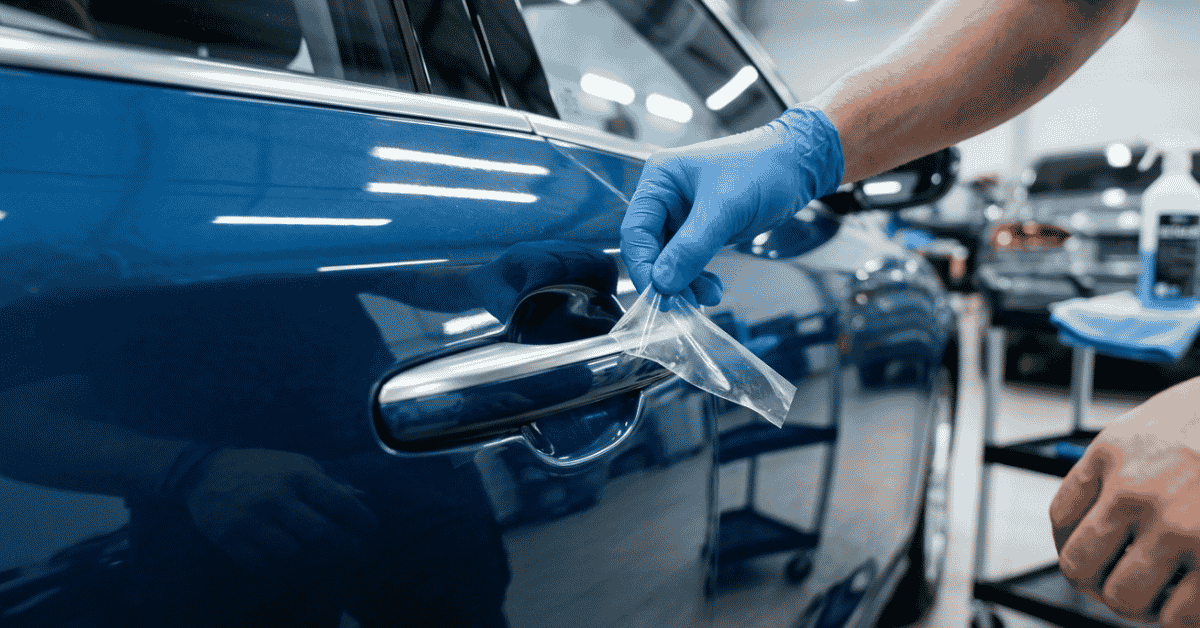
Step 3: Lift One Edge
Start at a corner.
Use:
- Fingernail
- Plastic card
Avoid sharp tools.
I always work slowly here.
Step 4: Peel Gradually
Pull the protector at a low angle.
Do not yank it.
Slow peeling helps:
- Reduce residue
- Protect paint
- Prevent tearing
Patience pays off.
Step 5: Remove Remaining Adhesive
Some residue may remain.
Apply adhesive remover and wait briefly.
Then wipe gently with a microfiber cloth.
Step 6: Final Cleaning
Wash the area again.
This removes:
- Residue
- Cleaner
- Dirt
The surface should now look clean and smooth.
Car Door Handle Protector Remove Methods Compared
Different methods work for different situations.
| Method | Ease of Use | Paint Safety | Adhesive Removal |
|---|---|---|---|
| Hair Dryer | Excellent | Excellent | Good |
| Heat Gun | Good | Moderate | Excellent |
| Plastic Scraper | Good | Excellent | Fair |
| Adhesive Remover | Excellent | Excellent | Excellent |
| Metal Blade | Poor | Poor | Good |
I almost always recommend the hair dryer method.
Common Problems During Removal
Even simple jobs can create challenges.
Protector Tears Apart
Older protectors may become brittle.
If this happens:
- Reapply heat
- Peel smaller sections
- Stay patient
Forcing it usually makes things worse.
Adhesive Stays Behind
This is very common.
I encounter this problem more than any other.
Usually, adhesive remover solves it.
Surface Feels Sticky
After removal, the area may still feel tacky.
Continue cleaning until the surface feels smooth.
Paint Looks Different
Sometimes the protected area looks newer.
This is usually because surrounding paint aged in sunlight.
The paint itself is often fine.
Mistakes to Avoid
I learned some of these lessons the hard way.
Using Too Much Heat
Excessive heat can create problems.
Avoid:
- High heat guns at close range
- Prolonged heating
- Excessive temperatures
Gentle warmth works best.
Pulling Too Fast
Fast removal increases the chance of:
- Tearing
- Residue
- Frustration
Slow removal is safer.
Using Sharp Tools
Metal blades can scratch paint quickly.
Always choose plastic tools instead.
Skipping Cleanup
Residue left behind attracts dirt.
A proper final cleaning makes a big difference.
Tips From My Experience
After removing several protectors, I developed a few habits.
Work in Mild Weather
Moderate temperatures help.
Extreme cold can make protectors brittle.
Warm weather often makes removal easier.
Take Your Time
The biggest mistake is rushing.
A careful approach often saves time overall.
Test Products First
If using adhesive remover, test a small area first.
This adds peace of mind.
Replace Protection Quickly
If you plan to install a new protector, do it soon.
Fresh paint surfaces are easier to prepare when clean.
When Professional Help May Be Worth It
Most people can remove protectors themselves.
However, professional help may be useful if:
- The film is extremely old
- Adhesive is severe
- Paint damage already exists
- Large areas require removal
A detail shop can often handle difficult cases safely.
My Honest Experience With Car Door Handle Protector Remove
The first time felt intimidating.
I worried about damaging the paint. In reality, the process was easier than expected once I used heat and patience.
Today, I see car door handle protector remove as a simple maintenance task. The right tools and a careful approach usually produce excellent results.
Most people can complete the job in less than an hour and achieve professional-looking results.
FAQs
How do I perform a car door handle protector remove safely?
Use gentle heat, lift one edge carefully, and peel slowly. This method helps remove the protector while protecting the paint. Learn more about safe removal methods.
Will car door handle protector remove damage paint?
Usually not. When done properly with heat and patience, car door handle protector remove is safe for most factory paint finishes. Learn more about paint protection.
What is the best tool for car door handle protector remove?
A hair dryer is often the safest tool. It softens adhesive without exposing the paint to excessive heat. Learn more about removal tools.
How do I remove adhesive after car door handle protector remove?
Use an automotive adhesive remover and a microfiber cloth. This helps dissolve sticky residue without harming the paint. Learn more about adhesive cleanup.
How long does car door handle protector remove take?
Most car door handle protector remove jobs take between 15 and 60 minutes, depending on age and adhesive condition. Learn more about removal techniques.